PhotoCraft · Beginner
Layers, masks and adjustment layers in PhotoCraft
Edit without touching your original pixels: duplicate layers, add a Hue/Saturation adjustment, limit it with a selection and a layer mask, and paint the mask by hand.
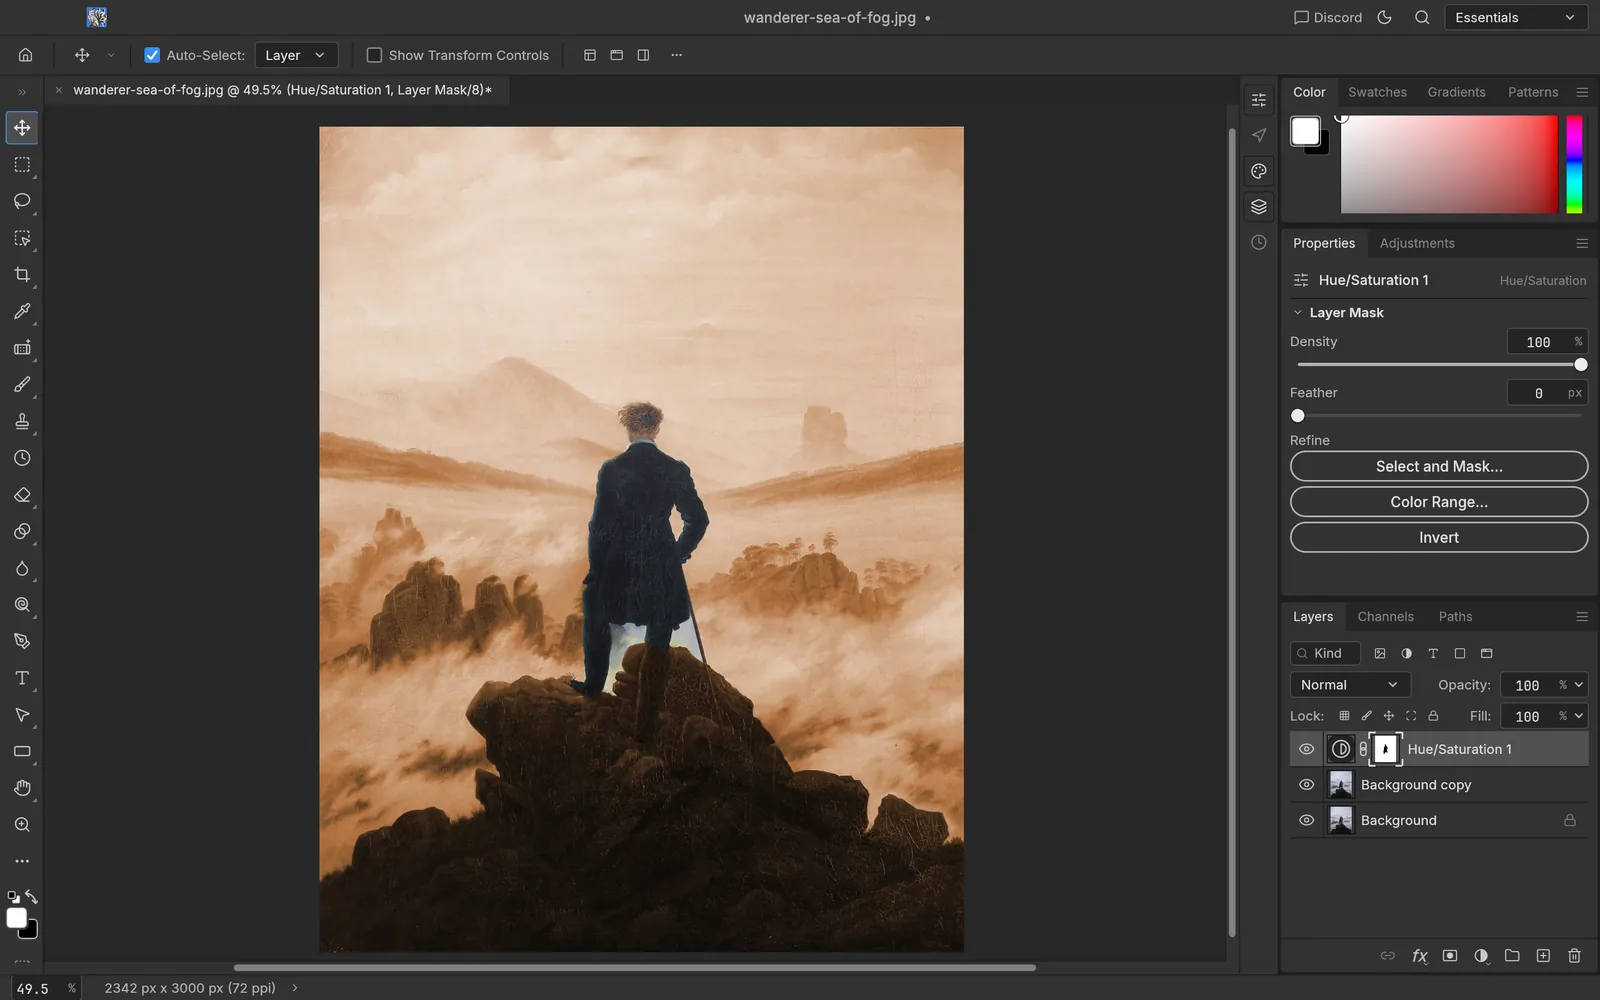
Non-destructive editing is the main reason to use a Photoshop-style editor instead of a simple photo app. In this tutorial we tint a painting sepia while keeping the figure in its original colours, without changing a single original pixel.
1. Duplicate the background
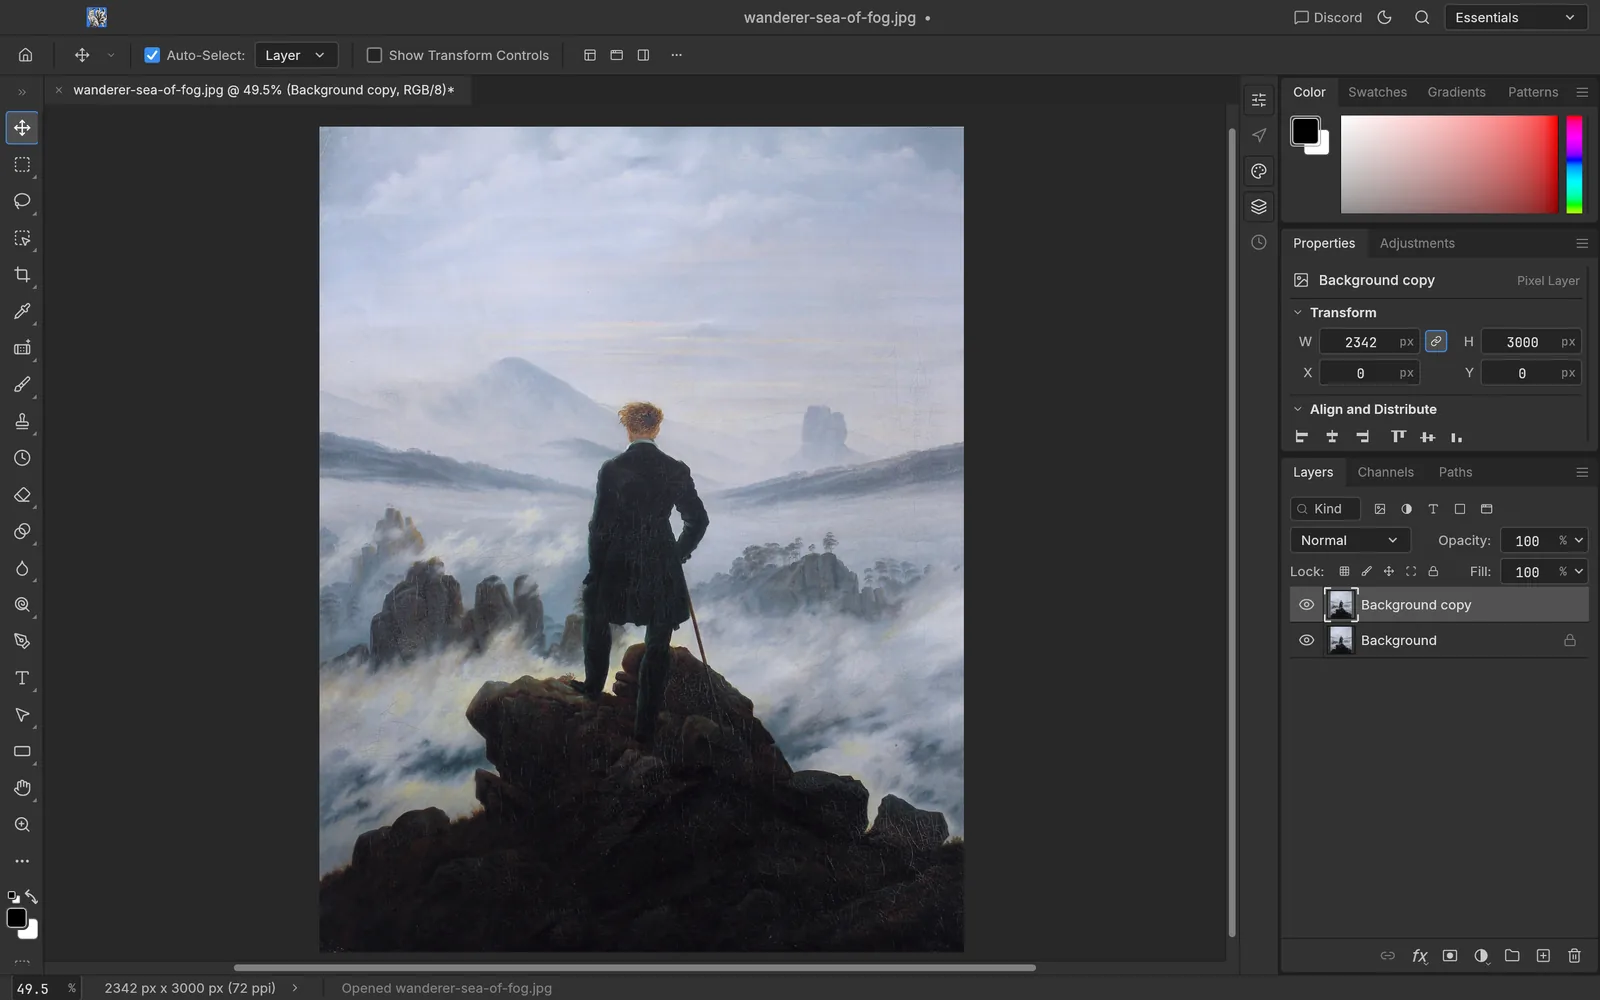
Select the Background layer and press ⌘J / Ctrl+J (Layer › Duplicate Layer). You now have a copy to experiment on; the original stays locked underneath.
2. Add an adjustment layer
Adjustment layers apply a colour change on top of everything below them, and you can change or remove them at any time. Click the half-filled circle at the bottom of the Layers panel to open the New fill or adjustment layer menu, or use the Adjustments panel.
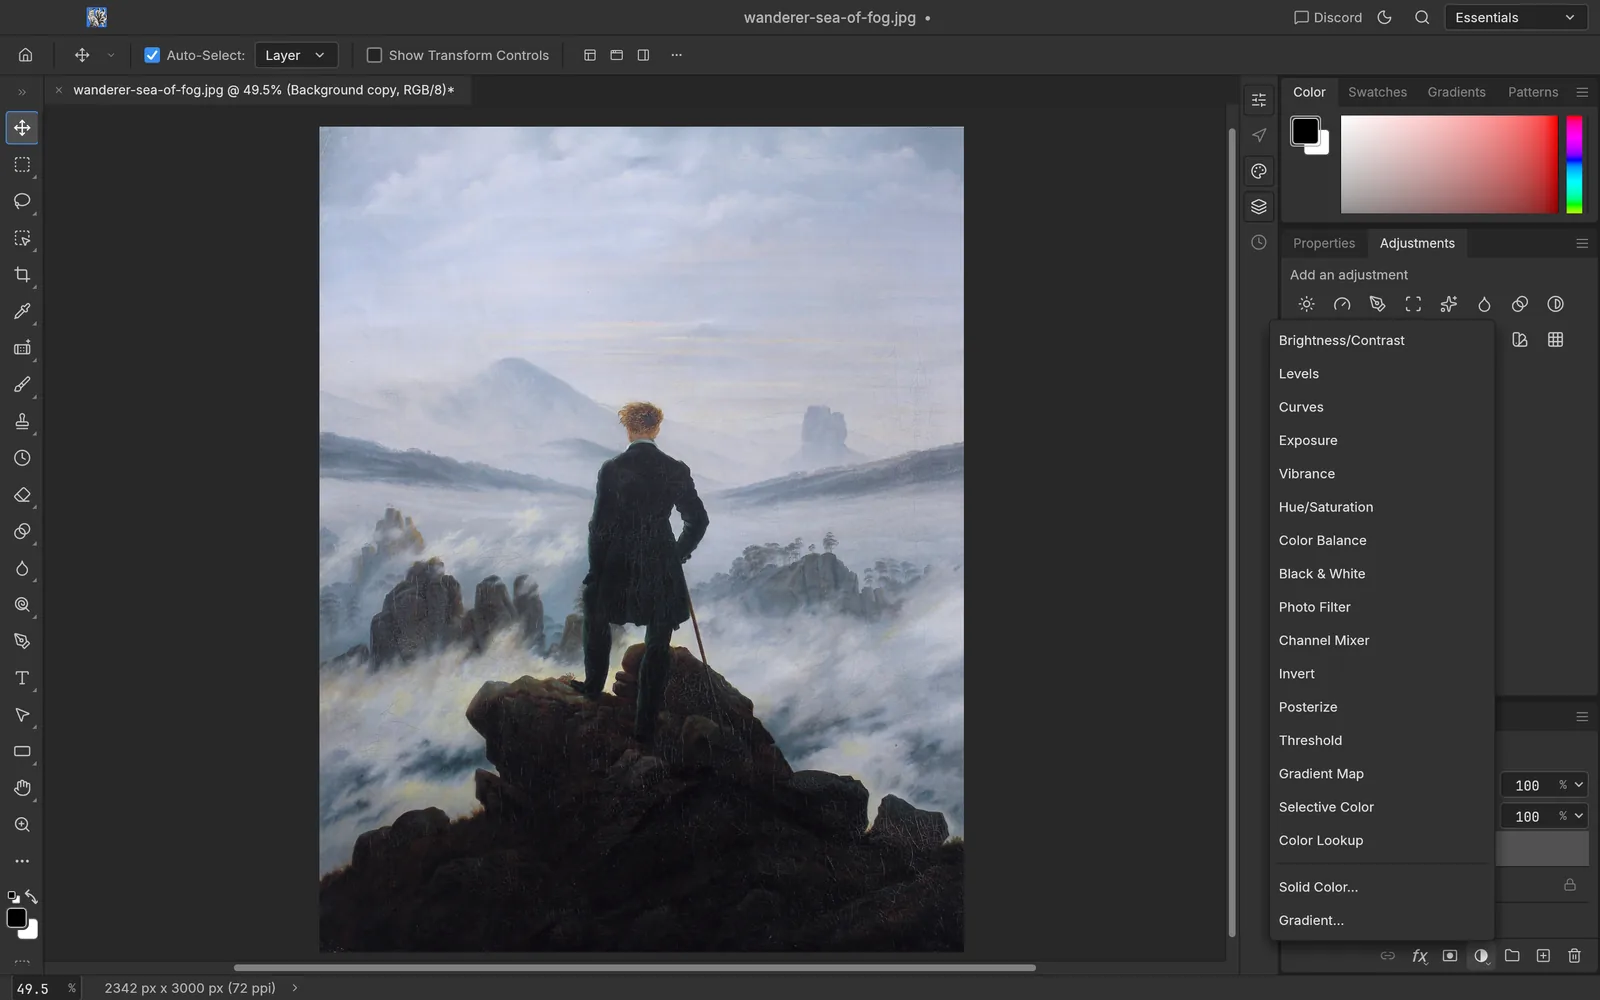
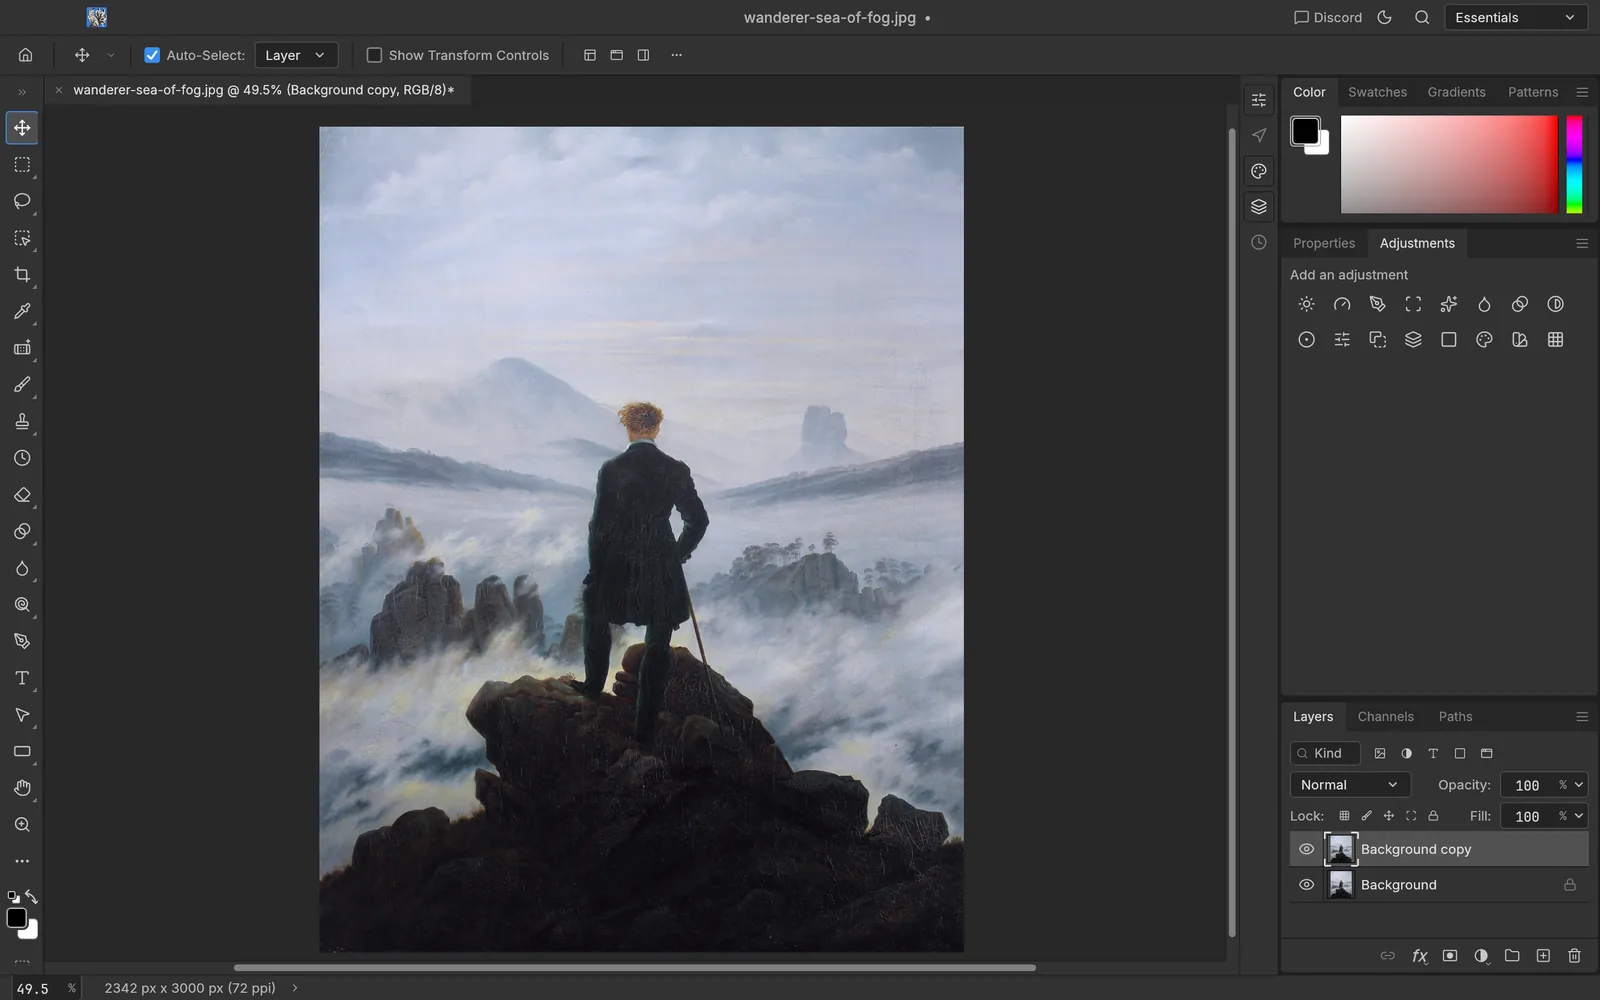
PhotoCraft has 16 adjustment layers, including Curves, Levels, Black & White, Channel Mixer, Selective Color and Color Lookup.
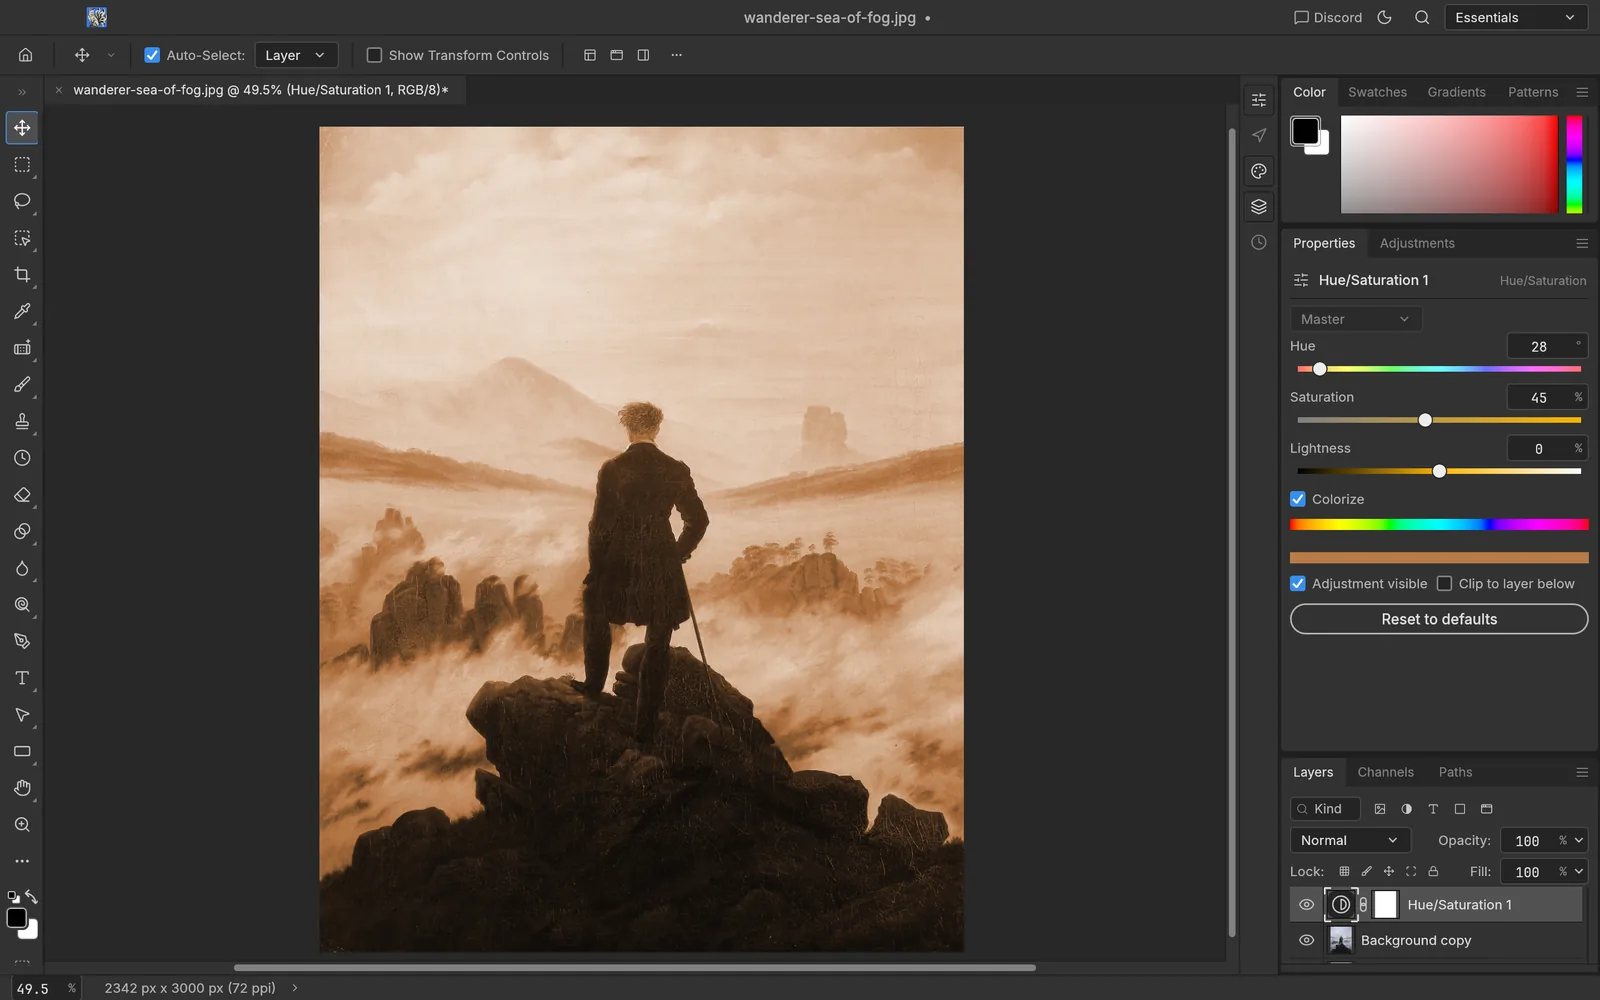
3. Tint the image with Hue/Saturation
Choose Hue/Saturation. In the Properties panel, turn on Colorize, then set Hue to about 28 and Saturation to about 45 for a warm sepia.
4. Select the subject
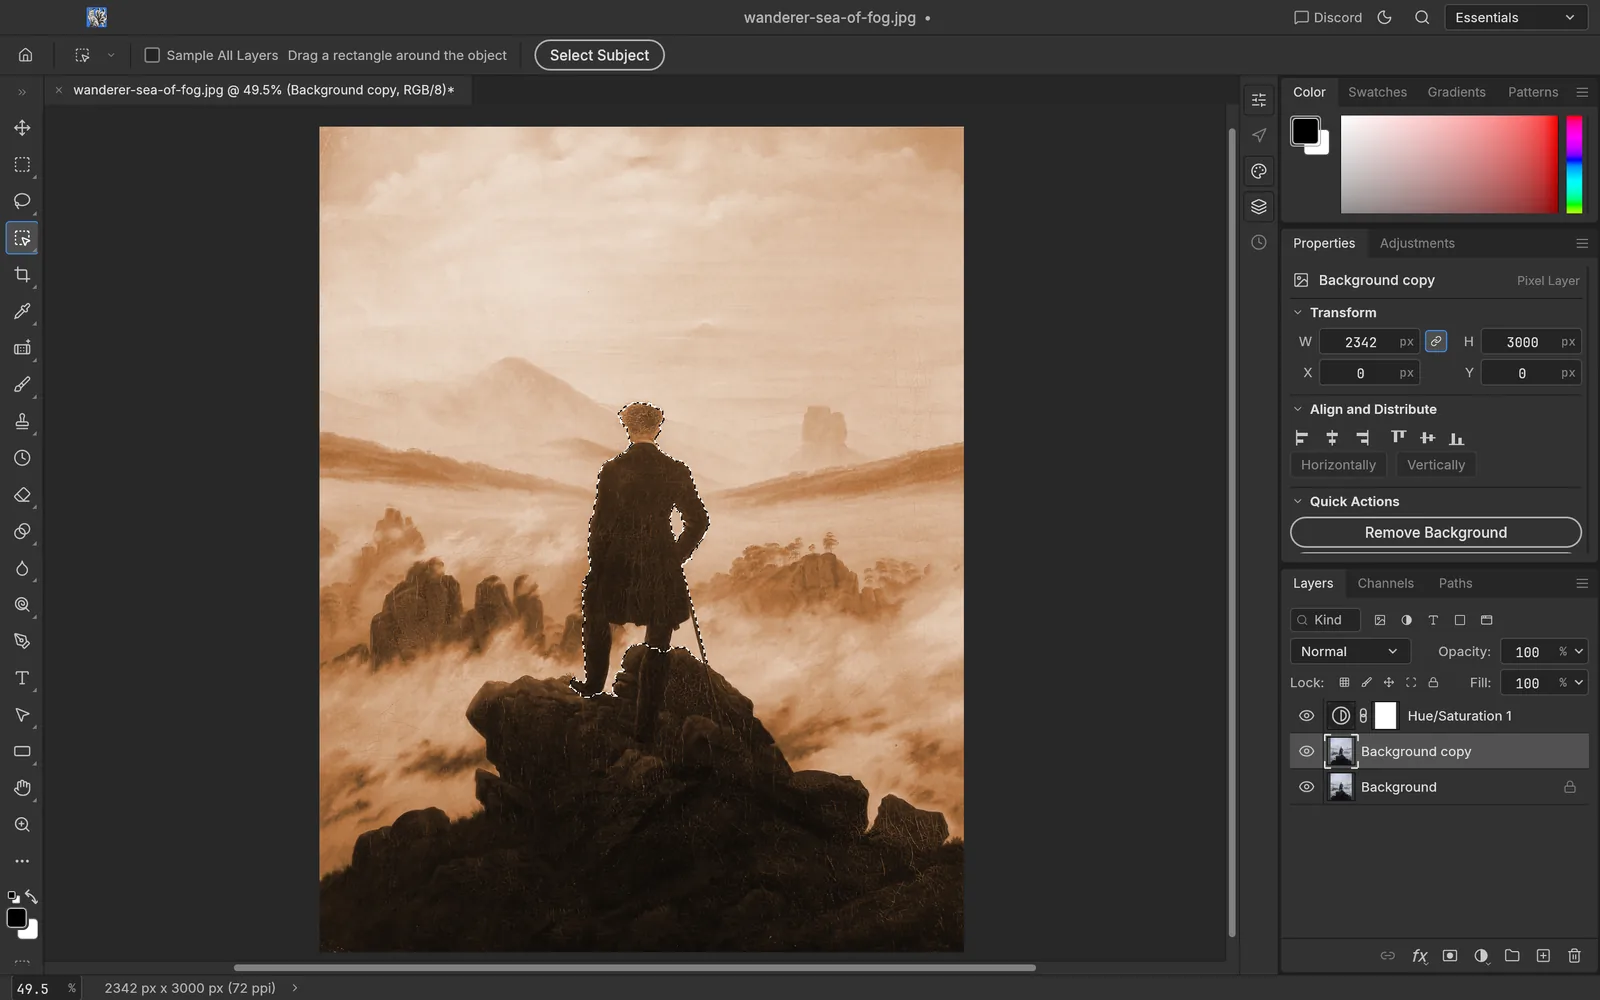
Pick the Object Selection tool (it shares a slot with Quick Selection and the Magic Wand, shortcut W) and drag a box around the figure. PhotoCraft finds the edges for you; the smart selection runs on your computer, with no upload. Select › Subject is another option, though on this painting it grabbed too much, so a drag worked better.
5. Turn the selection into a mask
With the selection active, select the adjustment layer and add a layer mask (the rectangle-with-circle button at the bottom of the Layers panel). Then press ⌘I / Ctrl+I with the mask selected to invert it, so the adjustment affects everything except the figure.
Unlike Photoshop, PhotoCraft 0.7.0 keeps the selection active after you create the adjustment. Press ⌘D / Ctrl+D to deselect before painting.
6. Refine the mask with a brush
Masks follow one rule: black hides, white reveals. Select the mask thumbnail, take a soft Brush (B), and paint with black to bring back the original colours, or with white to restore the effect. Press X to swap colours.
Why this matters
Nothing you did changed the original pixels. Hide the adjustment with its eye icon, change its settings any time by double-clicking it, or delete it. Save as PSD to keep every layer and mask; see working with PSD files.
Don’t have PhotoCraft yet?
Free and open source for Windows, macOS and Linux.
Artworks shown: Vincent van Gogh, Wheat Field with Cypresses (1889, The Met, CC0); Johannes Vermeer, The Milkmaid (c. 1660, Rijksmuseum); Caspar David Friedrich, Wanderer above the Sea of Fog (c. 1817); The Blue Marble (NASA, 1972); Pillars of Creation (NASA, ESA, and the Hubble Heritage Team (STScI/AURA), 2014). All public domain. Screenshots: PhotoCraft 0.7.0, captured by ArtCraft AI Guide.
All tutorials