Install guide · Windows
How to install PhotoCraft on Windows
Install PhotoCraft 0.7.0 on Windows 10 or 11. It takes about three minutes.
Time: About 3 minutesWindows 10 or 11About 62 MB to downloadBased on PhotoCraft 0.7.0 · October 11, 2026
- 1
Download the installer
Most PCs need the x64 MSI installer:photocraft-0.7.0-windows-x64.msi. Pick arm64 for Snapdragon and other ARM PCs, or x86 for old 32-bit systems. Prefer not to install? Take the portable ZIP instead.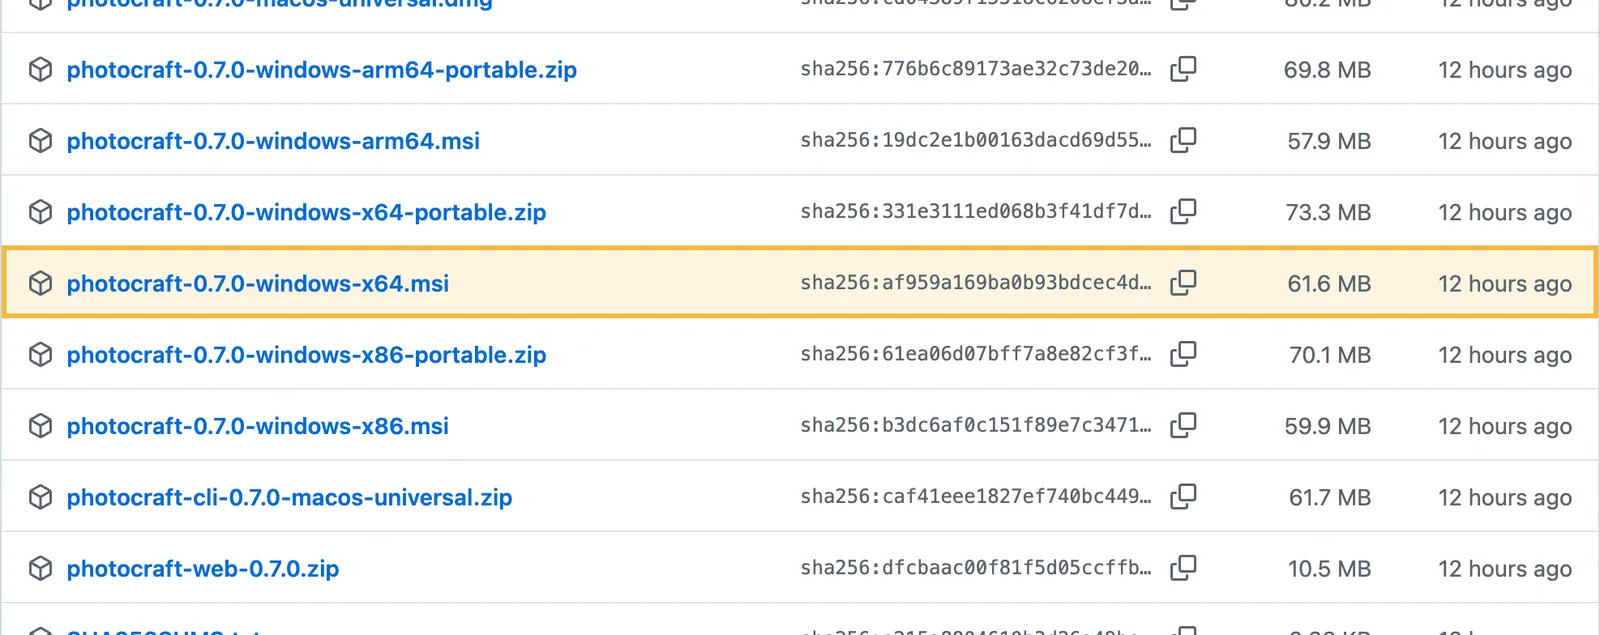
- 2
Verify the file (optional)
Open PowerShell in your Downloads folder, compute the SHA256 and compare it with the matching line in SHA256SUMS.txt.Get-FileHash .\photocraft-0.7.0-windows-x64.msi -Algorithm SHA256 - 3
Run the installer
Double-click the MSI and follow the prompts. If SmartScreen says “Windows protected your PC” and the file came from the official GitHub release, choose More info → Run anyway. - 4
Start PhotoCraft
Search for PhotoCraft in the Start menu. Use File › Open or drag an image onto the window to start editing.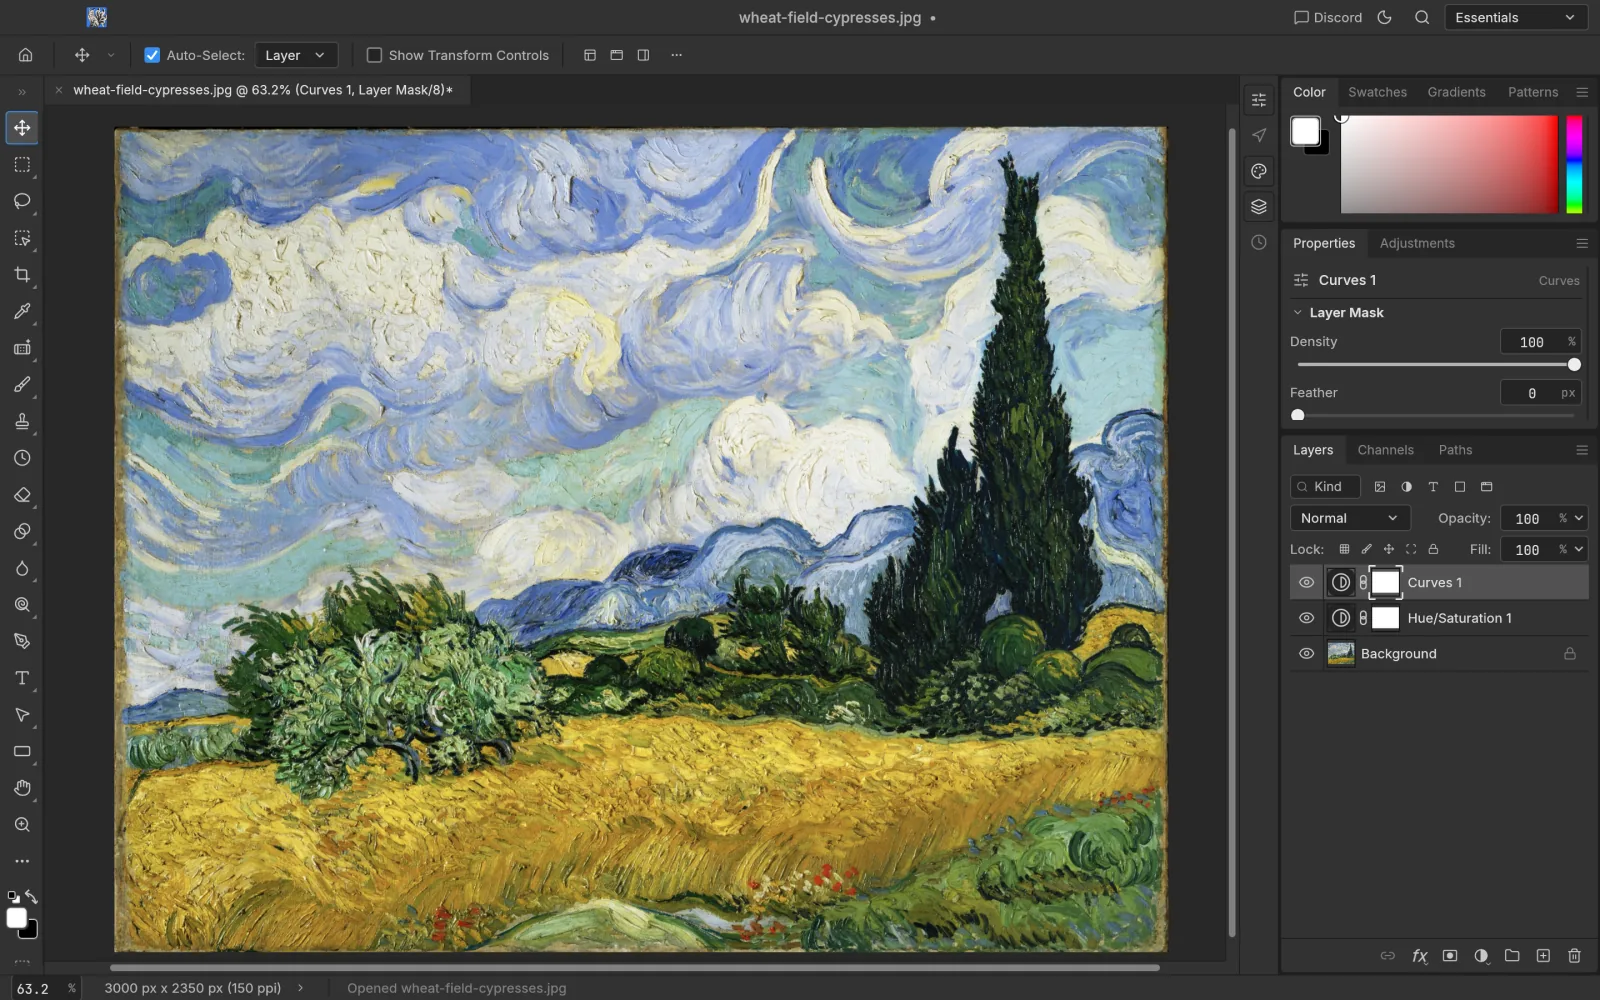
Portable version (no install)
Download
photocraft-0.7.0-windows-x64-portable.zip, unzip it anywhere (a USB stick works) and run PhotoCraft from that folder.Troubleshooting
Black window or a crash at start
PhotoCraft draws the canvas on the GPU. Update your graphics driver first. If it still fails, search GitHub Issues and file one with your Windows version, graphics card and a screenshot.
x64 or arm64?
Open Settings › System › About and look at “System type”: “x64-based processor” means x64, “ARM-based processor” means arm64.
Uninstall
Open Settings › Apps › Installed apps, find PhotoCraft and choose Uninstall. For the portable version, delete its folder.
Other systems