PhotoCraft · Beginner
PhotoCraft quick start: open, zoom, resize and export
Your first ten minutes with PhotoCraft: the start screen, opening an image, finding your way around the window, resizing and saving a copy.
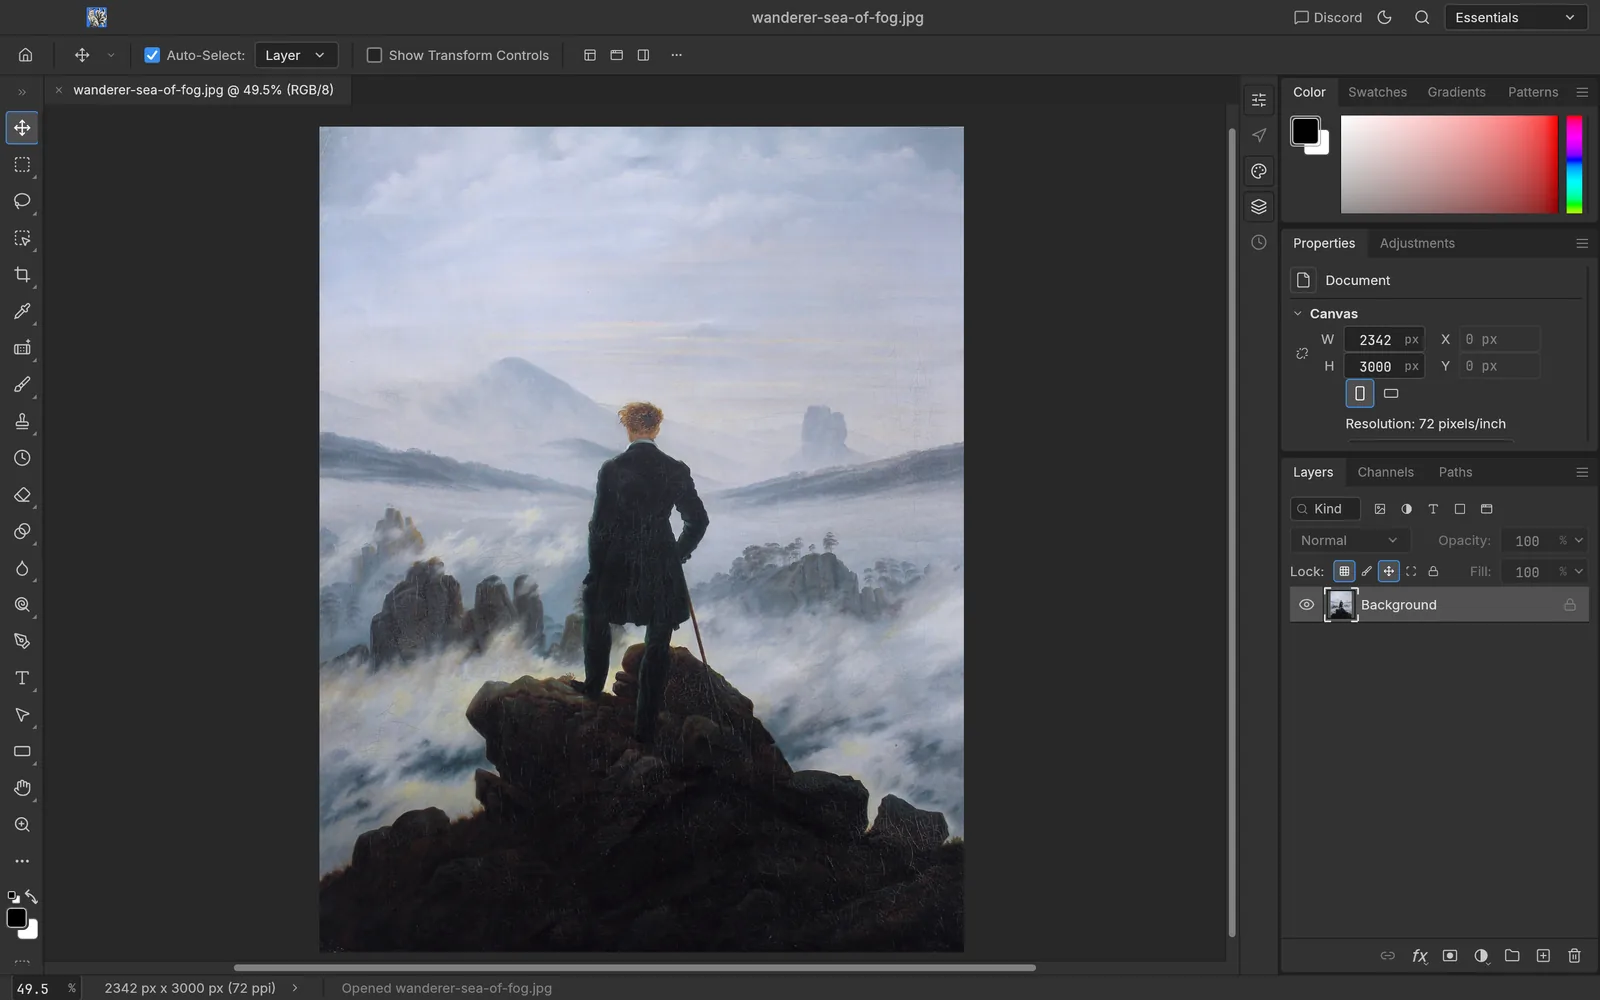
If you have used Photoshop, PhotoCraft will feel familiar within minutes: the menus, panels and shortcuts are deliberately in the same places. This guide walks through the basics using PhotoCraft 0.7.0. If you haven’t installed it yet, start with the download page.
The start screen
When PhotoCraft opens without a document, it shows a start screen with New document… (⌘N / Ctrl+N), Open… (⌘O / Ctrl+O) and your recent files. You can also drop an image or PSD anywhere on the window to open it.
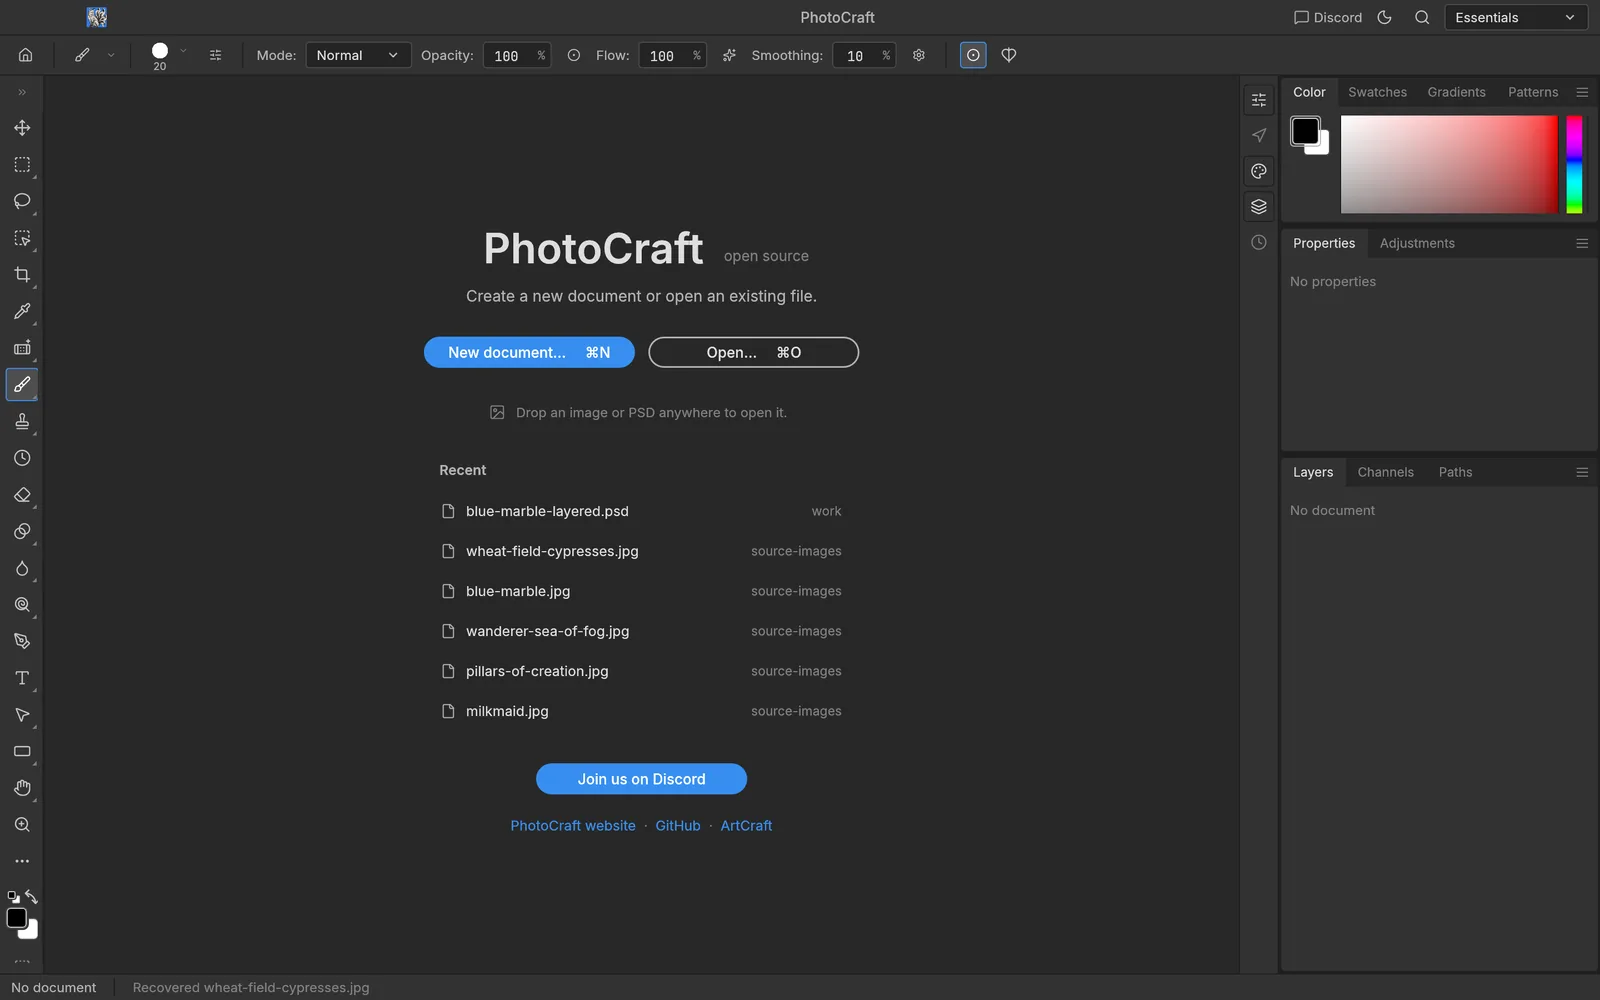
Open an image
Use File › Open, the Open button, or drag a file onto the window. PhotoCraft opens JPEG, PNG, WebP, TIFF, PSD/PSB, HEIC photos and many more formats. The image opens fitted to the window, with a Background layer in the Layers panel.
Find your way around
- Tools run down the left edge. Hover a tool to see its name and shortcut, as in Photoshop (V for Move, M for Marquee, B for Brush…).
- The options bar at the top changes with the selected tool.
- Panels sit on the right: Color, Properties, Layers, Channels and Paths. Use the Window menu to show more.
- Press ⌘F / Ctrl+F to open the command palette and search for any command by name.
Zoom and pan
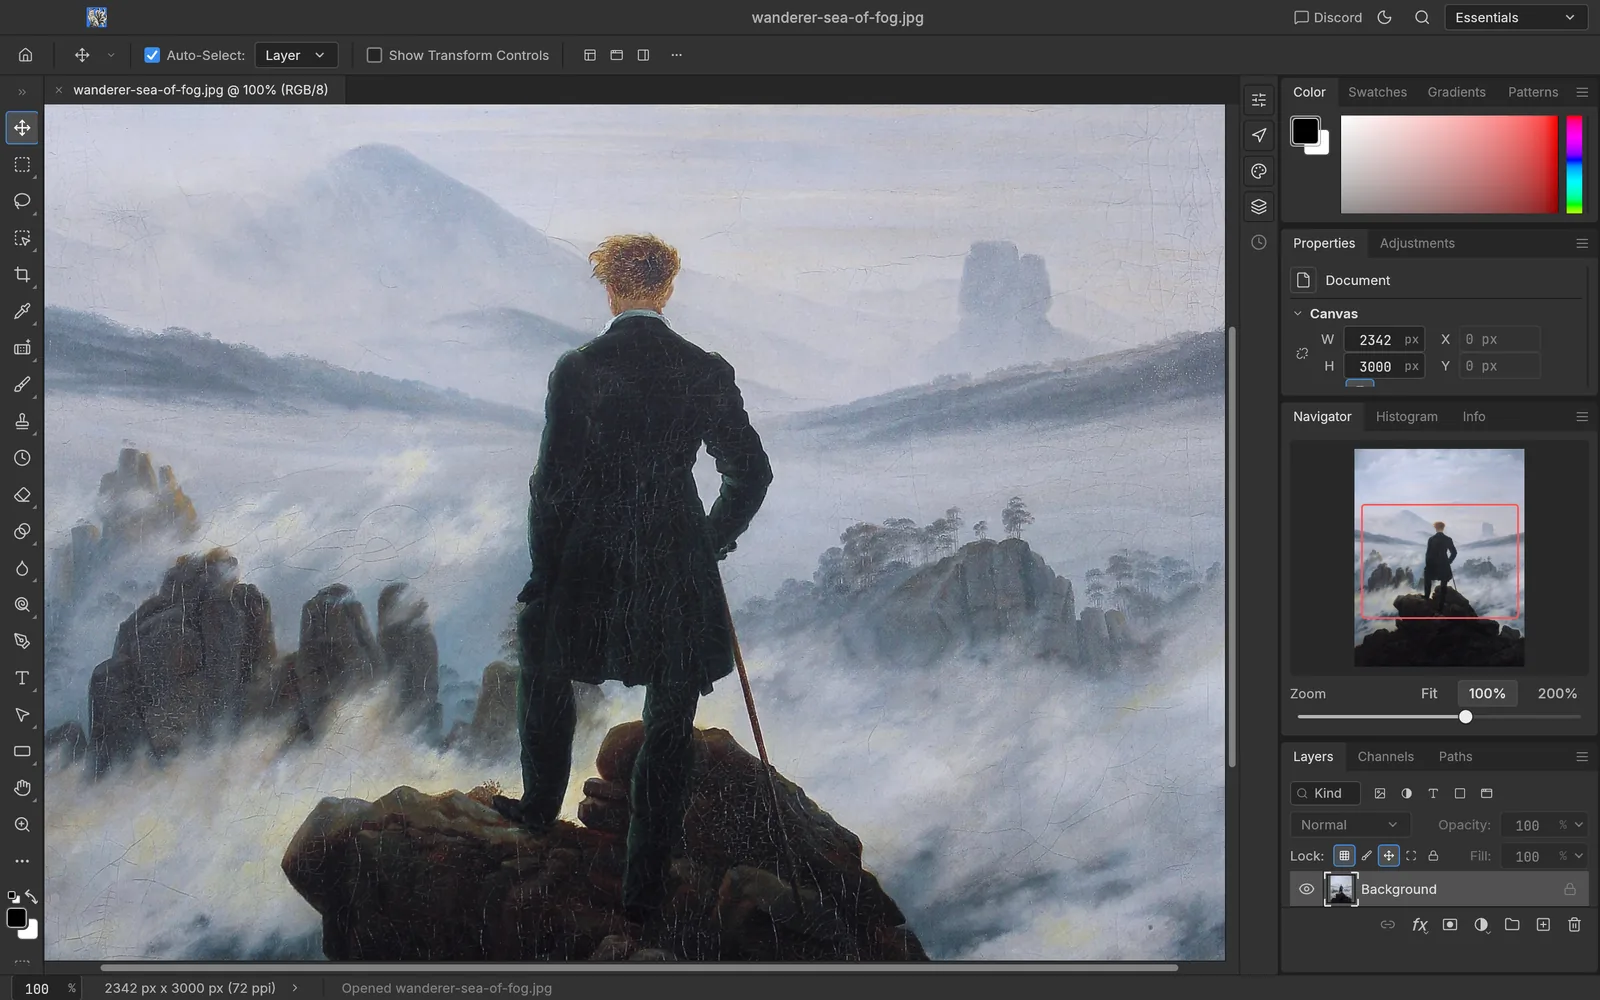
Zoom with ⌘+ / ⌘− (Ctrl on Windows and Linux), ⌘1 for 100% and ⌘0 to fit the window. Hold Space and drag to pan. The Navigator panel shows where you are: its red box is the visible area, and the slider underneath sets the zoom.
Change the image size
Open Image › Image Size… to change the pixel dimensions. Keep the link icon on so width and height change together, and pick a resampling method (Bicubic is a safe default).
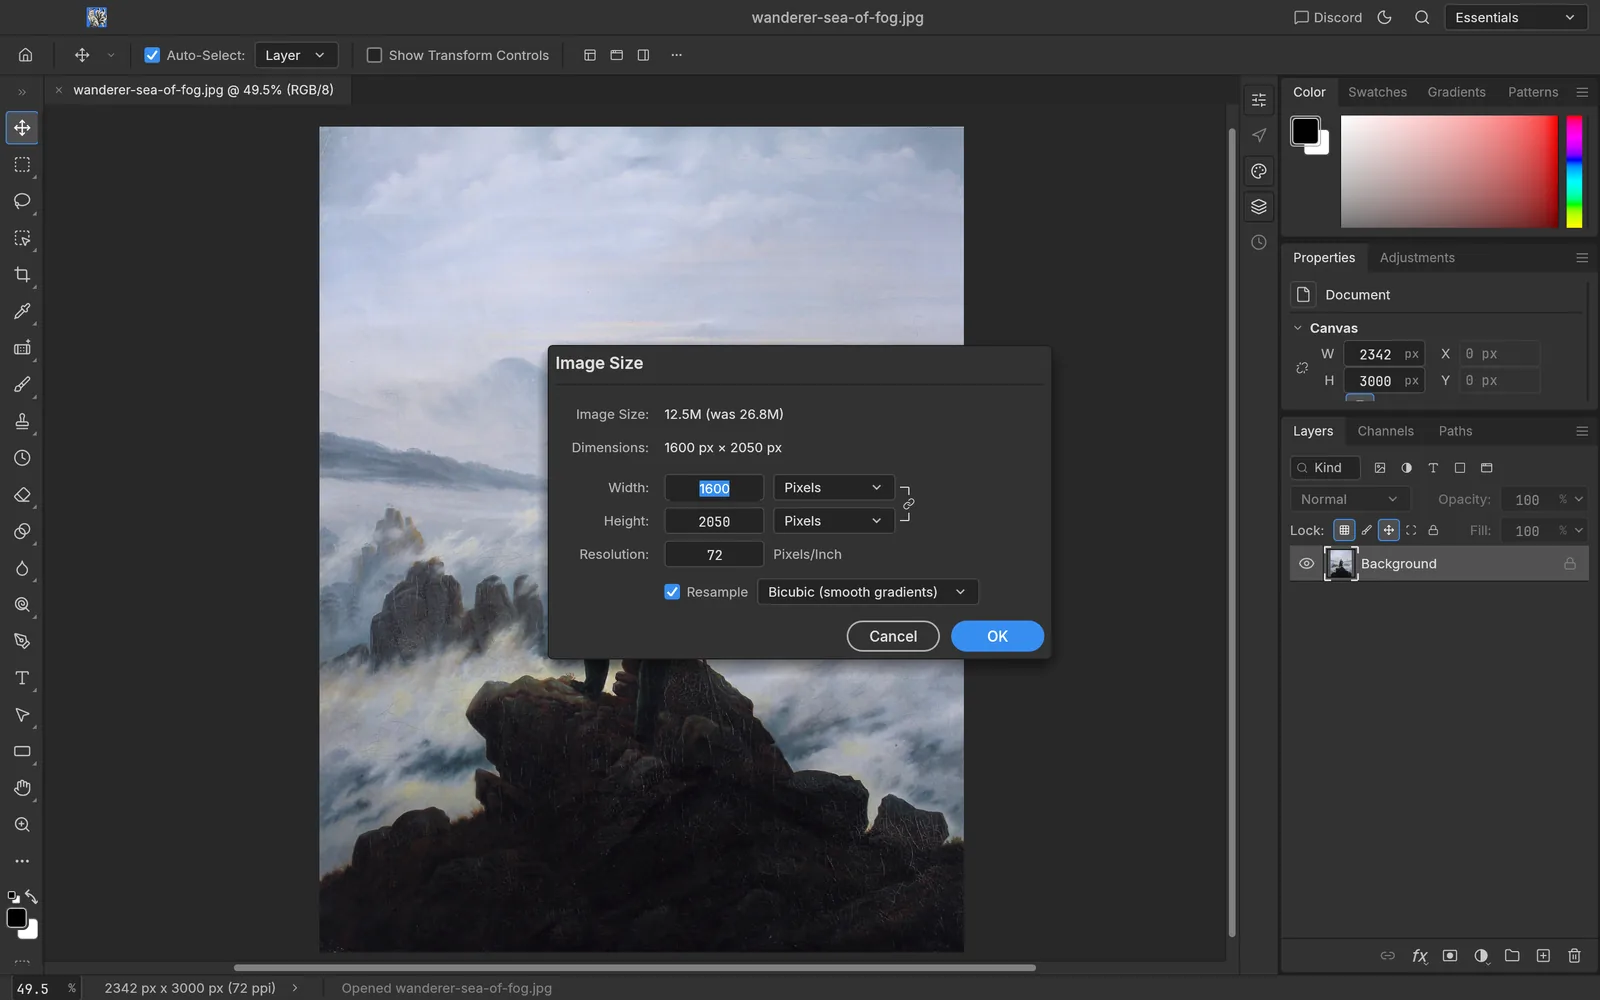
In 0.7.0 we noticed that typing a new width didn’t always update the height, even with the link on. Check both numbers before you click OK.
Save or export
- File › Save keeps layers in a PSD or PhotoCraft’s own
.pcraftfile. - File › Export › Export As… writes a flat JPEG, PNG or WebP, with a quality setting and a size preview.
- File › Export › Quick Export as PNG does it in one click.
Saving a layered document as JPEG or PNG flattens it, and PhotoCraft tells you so in a notice.
Next steps
Continue with layers, masks and adjustment layers, or see how PhotoCraft compares with Photoshop.
Don’t have PhotoCraft yet?
Free and open source for Windows, macOS and Linux.
Artworks shown: Vincent van Gogh, Wheat Field with Cypresses (1889, The Met, CC0); Johannes Vermeer, The Milkmaid (c. 1660, Rijksmuseum); Caspar David Friedrich, Wanderer above the Sea of Fog (c. 1817); The Blue Marble (NASA, 1972); Pillars of Creation (NASA, ESA, and the Hubble Heritage Team (STScI/AURA), 2014). All public domain. Screenshots: PhotoCraft 0.7.0, captured by ArtCraft AI Guide.
All tutorials